Repairing an automatic transmission ourselves involves careful steps. First, we evaluate wear and prepare by gathering tools. We then drain the fluid, remove the transmission, and disconnect the components. After cleaning and inspecting parts, we measure and replace worn components. Rebuilding involves using new or remanufactured parts. For reassembly, it's essential to lubricate moving parts, align everything, and follow manufacturer specifications. Post-reassembly, we conduct thorough road tests and fluid checks, monitor shifting, and make performance adjustments. To learn more about handling each of these steps, let's dive further into the specifics of a DIY automatic transmission repair.
Key Takeaways
- Identify and assess signs of transmission wear, including fluid leaks and slipping gears.
- Disassemble the transmission by carefully draining the fluid and removing the transmission using a jack.
- Clean and inspect all transmission parts for wear, replacing damaged components with new or remanufactured ones.
- Reassemble the transmission following manufacturer specifications, ensuring proper alignmentAdjusting the angles of the wheels to ensure they are set to the vehicle manufacturer’s specificat... and torque settings.
- Conduct a road test to verify shifting quality, performance, and absence of leaks.
Evaluation and Preparation
Before delving into the nuts and bolts of automatic transmission repair, let's start with a thorough assessment and preparation. First, we need to identify signs of wear, such as fluid leakage and slipping gears. These indicators help us decide if a transmission rebuild process is necessary. Consider the vehicle's mileage and usage patterns; higher mileage and strenuous use often mean more extensive wear on transmission components.
Next, gather all the necessary tools and equipment for our DIY transmission repair. A detailed guide will list both standard and specialized tools required for the job. Investing time in assembling these tools beforehand saves us from unnecessary delays during the rebuild process.
Cost-effectiveness is another critical factor. Compare the expense of a rebuilt transmission to other repair options. Sometimes, seeking professional advice can provide an accurate evaluation of the transmission's condition, ensuring that our DIY efforts are well-directed.
Preparation is essential. By evaluating the signs of wear and tear and equipping ourselves with the necessary tools, we set a solid foundation for a successful DIY transmission repair journey. Let's proceed methodically, ensuring each step is well-thought-out before moving forward.
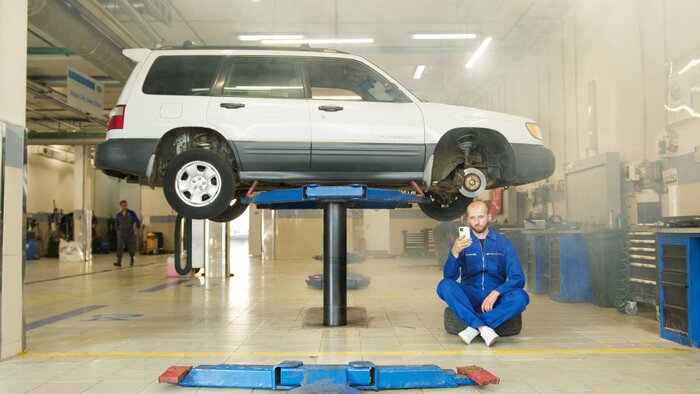
Disassembling the Transmission

Having thoroughly evaluated and prepared, we can now focus on disassembling the transmission. This step is vital, and attention to detail will help prevent confusion and errors during reassembly. Here's how we should approach it:
- Drain Transmission Fluid: Before anything else, drain the transmission fluid completely. This step is necessary to prevent spills and contamination.
- Use a Transmission Jack: Safely remove the transmission from the vehicle using a transmission jack. This tool provides stability and easier access to internal components.
- Disconnect Carefully: Begin by disconnecting electrical connectors, cooling lines, and linkage. Handle these parts with caution to avoid any damage.
- Label and Organize Parts: As we remove each component, label and organize parts meticulously. This systematic approach guarantees we can reassemble everything correctly.
Cleaning and Inspecting Parts
Cleaning and inspecting parts is an important phase in our DIY automatic transmission repair journey. We need to be thorough in this step to guarantee everything runs smoothly.
First, we'll use professional-grade cleaners to thoroughly clean all transmission parts. This guarantees that no debrisObjects on the road that can cause damage or accidents. or grime is left that could interfere with our inspection or the transmission's best performance.
After cleaning, it's time to inspect each component closely. We'll look at gears, clutches, bands, seals, and gaskets. Each part needs to be examined for any signs of wear or damage. This is vital to prevent future issues and extend the life of our transmission.
For instance, worn clutches or damaged gears can lead to severe transmission problems if not addressed.
We should also measure the dimensions of these parts against the manufacturer's specifications. This helps us determine if a part is still viable or needs replacing. If we find any worn or damaged parts, it's best to replace them with new or remanufactured components.
Taking the time now to clean and inspect ensures our rebuilt transmission will perform at its best and last for years to come.
Rebuilding and Replacing Components
Now, let's discuss the rebuilding and replacing components in our automatic transmission.
We'll begin by disassembling and inspecting each part, cleaning them thoroughly, and then replacing any damaged or worn-out components like gears, clutches, and seals.
Once everything is cleaned and replaced, we'll reassemble the transmission carefully, following the disassembly steps in reverse to guarantee proper alignment and secure installation.
Disassembly and Inspection Process
To begin the disassembly and inspection process, we need to carefully dismantle the transmission to access its internal components like gears, clutches, and seals. Once disassembled, we'll examine each part thoroughly. This step is important to identify worn or damaged parts that require replacement.
Here's a quick breakdown of the essential steps:
- Disassemble the Transmission: Carefully dismantle each component, making sure we keep track of the order and position for proper assembly later.
- Inspect Internal Components: Examine gears, clutches, seals, and friction plates for wear or damage. Look out for any signs of malfunction.
- Evaluate the Valve Body: Check the valve body, solenoids, and sensors to make sure they're functioning correctly. Any issues here can lead to significant transmission problems.
- Rebuild with New Parts: Replace damaged parts following manufacturer specifications. This guarantees our transmission will function correctly and last longer.
During the inspection, we'll identify any worn or damaged parts, such as bearings or gaskets, that need to be replaced. By focusing on these details, we can rebuild the transmission effectively.
Replacing damaged parts and adhering to the manufacturer's specifications for proper assembly ensures a reliable repair process.
Cleaning and Part Replacement

Thorough preparation is key to a successful DIY automatic transmission repair, so let's focus on cleaning and part replacement. First, we need to thoroughly inspect our transmission components, including gears, clutches, bands, seals, and gaskets. This helps us identify any wear or damage that could impact performance.
Cleaning these components is essential. Dirt and grime can compromise the functionality and longevity of our transmission, so using appropriate cleaning solutions and tools will make a significant difference.
Once everything is spotless, we can move on to part replacement. Any worn-out or damaged parts discovered during our inspection should be swapped out with quality replacement parts—either new or remanufactured. It's important to choose parts that meet or exceed OEM specifications to ensure reliability and efficiency.
Rebuilding the transmission involves reassembling it with the new components. Here, following proper procedures is crucial. Proper torque settings and alignment are non-negotiable to guarantee everything functions smoothly.
Reassembly Techniques
Reassembling an automatic transmission requires careful attention to detail and precise techniques. During the reassembly process, we need to make sure that each component is installed correctly and operates smoothly. Here are four essential steps to guide us:
- Proper Lubrication: Apply the appropriate lubrication to all moving parts. This includes bearings, gears, and the clutch assembly to reduce friction and wear.
- Clutch Assembly and Valve Body: Rebuild the clutch assembly and accurately position the valve body. Following the manufacturer's specifications for these parts is vital for proper operation.
- Alignment of Gears and Shafts: Confirm the alignment of gears and shaft alignment are perfect. Misalignment can lead to improper functioning or even damage.
- Cleanliness Standards: Maintain strict cleanliness standards. Even small particles can cause significant issues in a reassembled transmission.
Using specialized tools is a necessity for tasks like aligning the shafts and gears accurately. It's also important to double-check that we've followed all manufacturer specifications throughout the reassembly process. By focusing on these techniques, we can achieve a successful rebuild and make sure the transmission operates smoothly.
Post-Rebuild Testing
Now that we've reassembled our transmission, it's time for post-rebuild testing.
We'll start with road test procedures to evaluate performance, followed by checking fluid levels and inspecting for leaks.
Road Test Procedures
After completing a transmission rebuild, conducting a detailed road test is necessary to guarantee the vehicle's performance is up to standard. We need to carefully assess shifting quality, responsiveness, and the overall function of the transmission. Here's a step-by-step guide to make sure we cover all bases:
- Monitor Shifting Quality: During the road test, we need to pay close attention to how smoothly the gears change. Any hesitation or rough shifts could indicate an issue that needs further diagnostics or adjustments.
- Check Transmission Fluid Levels: While driving, it's important to monitor transmission fluid levels and temperature. This helps us verify there are no leaks and that the fluid is circulating properly, which is vital for reliable transmission.
- Evaluate Response to Throttle: We should test the vehicle's acceleration and deceleration. The response to throttle inputs needs to be smooth and consistent, without any delays or surges.
- Listen for Unusual Noises: Strange sounds during gear changes or while driving can signal underlying problems. We need to make note of these and correlate them with our road test results to pinpoint any issues.
Fluid Level Checks

Keeping the transmission fluid levels in check is a vital step in post-rebuild testing. After we've put in all that hard work, conducting fluid level checks becomes necessary to maintain proper fluid levels for peak performance.
Maintaining the correct fluid level is essential because it handles lubrication, cooling, and hydraulic functions within the transmission. Without proper fluid levels, we risk overheating, slipping gears, and damaging vital components.
We need to use the recommended transmission fluid and carefully follow the manufacturer's guidelines when checking and topping off fluid levels. To check the fluid, we'll typically warm up the engine, shift through the gears, and then inspect the fluid level on the transmission dipstick. This ensures that the fluid is circulated and at the correct temperature for an accurate reading.
Regularly monitoring and adjusting the transmission fluid levels should be part of our ongoing maintenance routine. By doing this, we prevent potential issues and ensure smooth operation of the vehicle. Remember, keeping the fluid at the proper level isn't just a one-time task but an ongoing responsibility to maintain peak performance and extend the life of our rebuilt transmission.
Performance Adjustments
With fluid levels properly maintained, we can move on to performance adjustments in our post-rebuild testing. Ensuring the reliability of our rebuilt transmission requires careful attention to several key areas. We need to verify that everything is functioning as expected and make necessary tweaks for peak performance.
- Pressure Tests: Using diagnostic tools, let's perform pressure tests to measure the hydraulic pressure within the transmission. This helps us identify any irregularities that could affect shifting.
- Road Tests: Next, we should conduct road tests to observe the transmission in real-world conditions. Pay attention to how it shifts through gears and responds to acceleration.
- Fluid Levels and Leaks: Consistently monitor fluid levels and inspect for leaks throughout the testing phase. Proper fluid levels are essential for smooth operation and longevity.
- Manufacturer Guidelines: Follow the manufacturer guidelines for assembly and fluid types. This ensures we're not overlooking any crucial steps that could impact performance and reliability.
Frequently Asked Questions
Can I Rebuild My Automatic Transmission Myself?
Yes, we can rebuild our automatic transmission ourselves if we've got mechanical knowledge, patience, and the right tools. It's important to follow manufacturer guidelines and consider professional help if we're unsure about the process's complexity.
How Do You Change a Transmission Step by Step?
Let's start by draining the fluid, then remove the pan and replace the filter. Inspect and clean the pan. Finally, reinstall everything and refill with the correct fluid. Always follow manufacturer guidelines for proper steps and specifications.
How to Rebuild a Transmission for Dummies?
We'll start by understanding the basic components, then follow beginner-friendly guides. We'll use tools like a torque wrench and transmission jack, label parts during disassembly, and consider a rebuild kit to replace necessary components.
Can You Replace a Transmission Yourself?
Yes, we can replace a transmission ourselves if we have the right tools, skills, and patience. Always follow manufacturer guidelines, use quality parts, and don't hesitate to seek advice from professionals or reputable sources to guarantee success.
Conclusion
To sum up, we've walked you through the essential steps to tackle a DIY automatic transmission repair. From evaluating and preparing your workspace to disassembling and cleaning parts all the way to reassembly and post-rebuild testing, we hope you feel more confident in your abilities. Remember, taking your time and following each step carefully will yield the best results. Happy wrenching, and may your transmission run smoothly for miles to come!